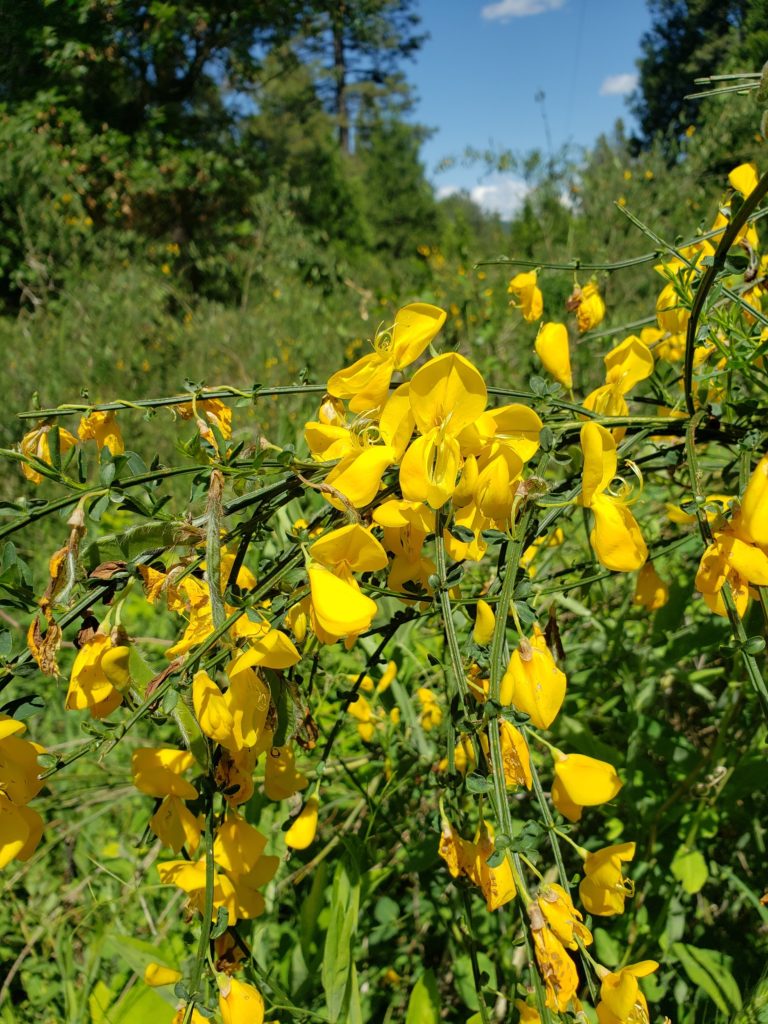
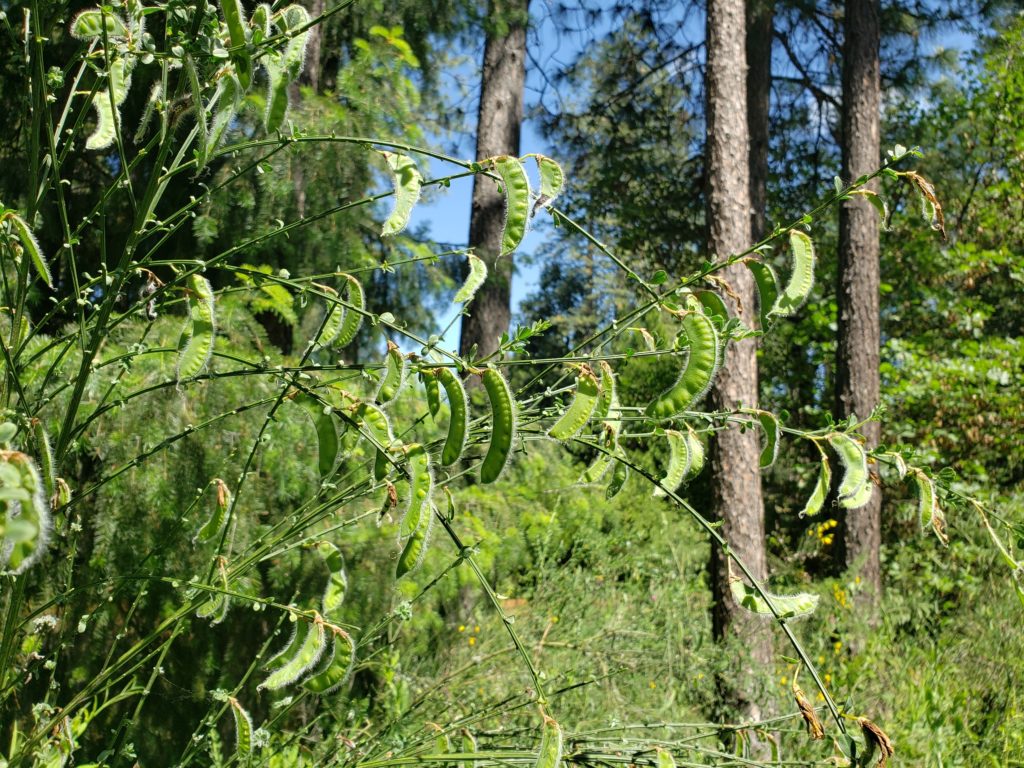
Scotch broom is wrapping up its bloom and starting to produce seeds. I’ll never forget my first June here, we had just moved to a fresh piece of land three weeks earlier. One day as it warmed I noticed a popping sound. I walked around to find out what it was. I found that it was Scotch broom pods, popping open and spewing their seeds in all directions. Each plant produces up to 10,000 seeds per plant. And they remain viable in the soil for up to 60 years.
I knew that Scotch broom was a real problem plant. And when I saw the numerous pods, and the numerous seeds in each pod, and the number of plants around us, I knew we were in for a long battle.

Many visitors and newcomers to the area may not realize the hazards of this plant and think it’s beautiful. But it’s a terribly noxious, invasive, non-native plant that has escaped into most of the western US. It’s one of the most flammable plants there is and poses an enormous threat to our community’s fire safety.
A clear indication of its flammability to us was when we had a burn pile going and we added green scotch broom, it burned and sparked like fireworks! We were shocked. It was green and fresh from the ground. When dried? Worse.
Scotch broom forms dense stands that burn hot and with their height, up to 6 ft. tall or more, can bring fire up into the tree canopy, increasing both the frequency and intensity of fire (firesafemarin.org).
And it’s not just the fire danger
The dense stands make it difficult for humans to walk through and they restrict wildlife movement. Plus, it displaces many native plants that provide wildlife habitat. It’s harmful to horses and reduces land for grazing.
It thrives here in our dry summers and is deer resistant. It’s from the pea family so it is a nitrogen fixer. That means it has the ability to get it’s nitrogen from the air, and not depend on soil fertility enabling it to grow in our poorest soils.
So are you now ready to go out and remove all the scotch broom you can see?
There are a few myths and methods to clearing Scotch broom
First of all, killing it with round-up is an option. But, what you have when you’re done is a stand of highly flammable “standing dead” plants. You still need to remove them. I’ve also heard people wonder about using the vinegar/salt method. But you have the same problem as above, plus the recipe comes with the warning to not use it if you ever want anything to grow there again.
I’ve heard what I truly believe are myths about removing Scotch broom. One is that you need to remove all the roots or they’ll re-sprout. I may be wrong, but I’m going out on a limb here and saying that it isn’t so. When I pull the plants I never find any structure on the root that would lead to re-sprouting. And with all the plants I’ve pulled I’ve never seen one that came from an older root structure. They were all seedlings. From those thousands of seeds in the soil.
Another version of that myth is that when you remove it, it just comes back. Here are the things that happen. If you cut it, it can re-sprout. BUT, if you cut it low enough, it won’t.
And if you pull it out, well, remember those seeds popping out of the pods? That’s what comes up, new seedlings.
I’ve removed a lot of plants and being a plant person, I look at them closely. In my mission to get rid of Scotch broom I didn’t give up and tried to figure out what will work. I did, and it’s hard work requiring diligence and determination, but it can be done. And the results are worth it!
If you have Scotch broom on your property, it’s a battle you’ll be fighting for a long time. But, it gets much easier if you do it right at first.
How I removed an acre and a half of Scotch broom: my four-pronged method
I needed to clear a few large patches of ground so I could start my vegetable and flower gardens. I have found four ways to get rid of Scotch broom depending on size. First of all, it’s easiest to do these tasks in the winter, after enough rain has soaked the ground to make it moist.
1. Get the small plants, they won’t get any smaller. The small plants are easiest to remove. You can pull them by hand. Whenever you see them! They’ll only get bigger and more difficult. In fact whenever I see small plants on a hike I spend a little time pulling them. I consider it my civic duty.
2. Use a Weed Wrench*-type tool to get the medium-sized ones. This is a tool that for the ones that are too big to pull. It grabs the bottom of the stem then you lever the plant out of the ground. It may not work on larger plants because the stem gripper slips. So on to the next method.
3. The large plants are the final hurdle. I figured that if I cut off the top of the plant below any green, it might not grow back. So I tried it, cutting below the branches.
This is important: you must saw the plant off below the lowest branches, close to the ground. You may leave a few inches of stubs but no green. Otherwise the plant may re-sprout.
It worked. I found that the stubs never re-sprouted. They did pose a tripping hazard, though. But in 2-3 years they were rotted enough to kick them over
Here’s my process: I was clearing a very dense stand, the kind we always walked around. I carried my hand clippers, Weed Wrench, loppers, and hand saw. I walked around and pulled the small ones. Then I went to the medium-sized plants and Weed Wrenched them out.
Next step was get to down on my hands and knees, hand saw and loppers in hand, and saw the biggest ones and lop the rest. All below any branches.
4. Maintain your beautiful new clearing
The fourth step, and the step you’ll do every single year, (it’s the easiest one!) is to go around and pull all the new seedlings that will come up. You have thousands, if not millions, of seeds in the soil. The plants start producing seeds when they’re only 3 yrs. old, so keep them from reaching that stage. Remain diligent! This is really the most satisfying step because you’re past the big hurdle and it’s easy!
A friend of mine has also cleared his Scotch broom this way and attests to it. Another friend maintains his Scotch broom with a mower but gets some re-sprouting. That’s because some don’t get cut low enough. So he does it every year. But it’s working.
Winter is a more pleasant time to do this
As I mentioned earlier, winter is the best time to do this work. When the soil is moist the small ones pull out easier. And the process of working on your hands and knees is much more desirable on a cool, moist day than on a hot summer day wondering if there’s a rattlesnake about.
What about all the dead plants?
A burn pile is suitable in the winter. I happen to have a little electric chipper that I’ve used to chip some up. It’s labor intensive, but makes it all small enough to be used for mulching!
Your reward for getting this done
You’ll be able to walk through that area again, start a new garden or landscape project, establish a native plant restoration that’s fire resistant, and you can rest easier knowing that the space you cleared no longer poses a fire threat.
I know this is labor intensive, but what is the cost of doing nothing? Thousands more Scotch broom plants.
If you have had other experiences and successes removing Scotch broom feel free to send me an email with your thoughts, or comment on my blog post at mydelightfulgardens.com.
*The Weed Wrench is no longer being made, but there are the Uprooter (theuprooter.com) and the Extractigator (extractigator.com) available now.

